 You are going to have to scroll quite a bit for this article, sorry…but images really help describe things right?
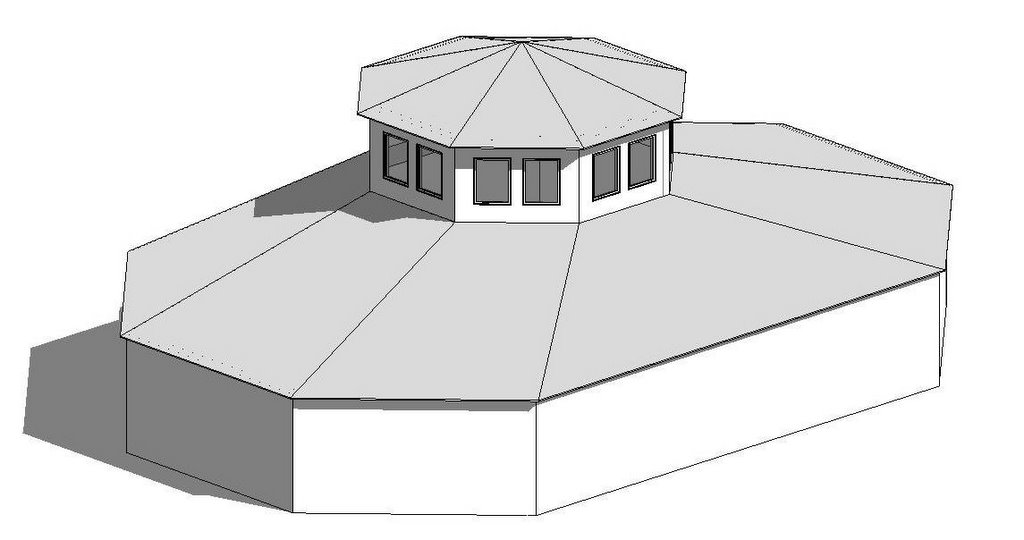
I thought I’d illustrate the steps to do this using Massing and a Solid Blend. All you really must "know" to model this is three things (beside how to use Revit), the shape of bottom, the shape of top and the overall height of the form.
First you need a building concept so in this instance the following image is the first floor plan of the building.
 This is the plan of the clerestory feature that starts on Level 3.
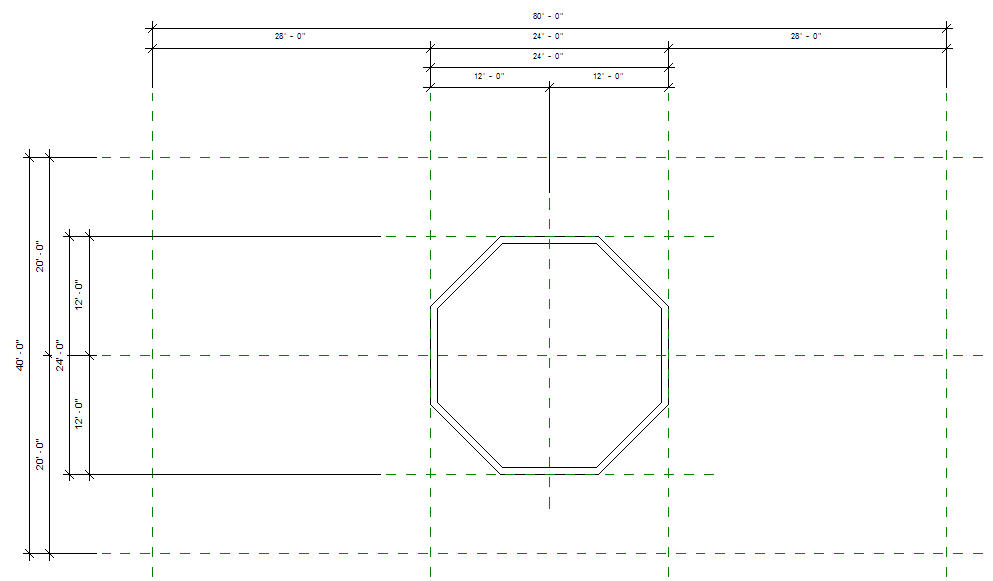 Here’s the South Elevation
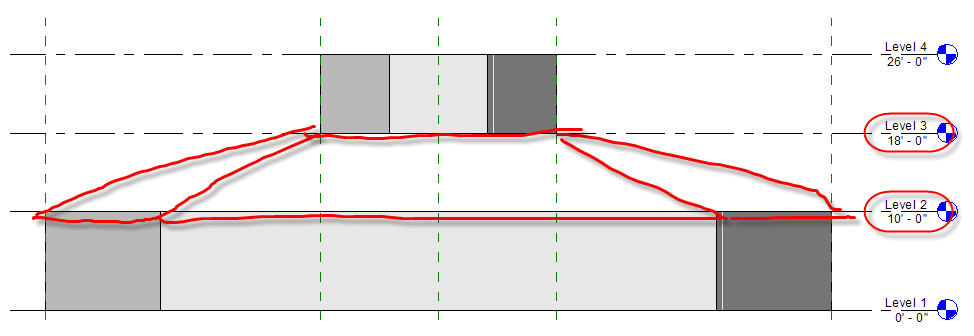 To start this off we need to click the Massing Design Bar tab, if it isn’t there just right click over the design bar somewhere and check the Massing option.
 You’ll probably get this message if you haven’t been using Massing and created something already in this session of Revit. It’s just warning you that in order to create a mass family you need to turn on massing and Revit just did it for you, how nice!
 Don’t know how to turn on massing? Here’s the button on the toolbar to toggle massing on/off. By the way, Revit doesn't show massing when you first open a project so don't panic when you do this for the first time and all your hard work is "gone"...just turn it on...she'll be right!
 So let’s make a massing family (In-Place Family by the way)
 Revit will ask you for a name for the family and offer Mass 1. You can accept it or pick a better name. Next Click: Lines and on the Options Bar choose, Polygon, enter 8 sides and choose Circumscribed Polygon
 It really doesn’t matter how you sketch the base of the roof mass, use whatever method you like. Just keep in mind it must be a closed sketch and that you are sketching the base of the blend right now…the bottom or lower roof eave. Here’s what it should look like.
 Next we need to sketch the shape of the top of the roof. Click Edit Top on the design bar and you’ll see the sketch you just did is gray but still visible. Use the same procedure to sketch the upper portion of the roof like the image below.
 Now click Finish Sketch on the design bar to finish the blend. Switch to the south elevation and you should see something like this.
 In my case the depth setting was 20 ft so it is much taller than I wanted. I can just drag the upper grip after selecting the solid to pull it down to Level 3. I can also just enter the correct depth value on the options bar. Either way it needs to stop at Level 3.
 Time to click Finish Mass on the design bar. Now we are ready to apply the roof. Choose Roof by Face from the Options Bar and pick the faces of the mass family. You may need to pick just the faces that follow the orthogonal walls first.
 Depending upon the thickness of the roof you are using Revit may complain that it can’t finish the roof if you pick all the faces in one go. You can try it…or just pick the first four like in this image.
 Click Create Roof
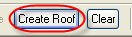
Now you are ready to pick the other faces.
 Click Create Roof
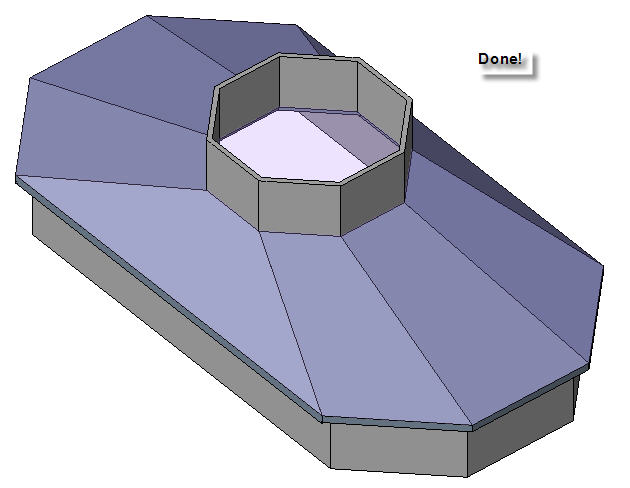 Changes made to the massing will permit you to apply those changes to the roof by choosing Remake on the Options Bar.
 This will only be available if the mass family changed and only if you pick the roof object afterward.
Happy Blending!
6 comments:
Hello Steve, guess why I am posting this in an early age Post? Lol. Simple, Your blog is interesting and informative and I start reading it from Bottom. Do u know the shortcut key for closing an opened view. Well in MS Word we can close d document by Ctrl+w. Which Short cut key accomplish the same task in RAC?
Hello Steve, m trying to do this tutorial. The image of octagon is appearing as if there r two octagon r placed beside each other. Is it so?
Also after Finishing the Sketch, the Octagon remain as just a Octagon Line Shape. Where is the Height option exist to give a height? as in your shape in South Elevation?
Also what is the shortcut key to close a View? [Not whole project].
Hi,
Window menu > Close Hidden Windows is the tool we use to close any view window we have open when one view is maximized. There is no keyboard shortcut defined in the stock installation. You can assign a shortcut of your choosing by editing your keyboard shortcuts file.
I'm sorry I'm not sure I understand your question. The octagon form is first defined as a massing solid blend which uses a base and top profile. Like other solids you need only drag the upper grip to change its height. If you don't have this then you must have used some other tool to create the octagon line work?
In the images I show different faces of the octagon form as selected (red) to indicate which faces I selected to use the Roof on Face tool.
Give it another try?
Thanks for suggesting the way to define Short cut. Also I m downloading the E-gress Video, referred by you, but suggest me that in which Video format (.avi & .flv) picture quality is Clear and Precise to understand the tutorial Steps properly.
Thanks.
The egress video is hosted by Screencast. You watch it in your browser. I have no idea what format it was saved in, I didn't make it, sorry.
Steve
Post a Comment